How Bell Peppers Grow: A Step-by-Step Life Cycle Guide
Published: 30 Oct 2025
Introduction: Why Bell Peppers Are a Garden Favorite
Bell peppers (Capsicum annuum) are vibrant, versatile and packed with nutrients. They come in a rainbow of colors including green, red, yellow and orange. Because of their sweet flavor and crisp texture, bell peppers are loved by home gardeners and chefs alike.
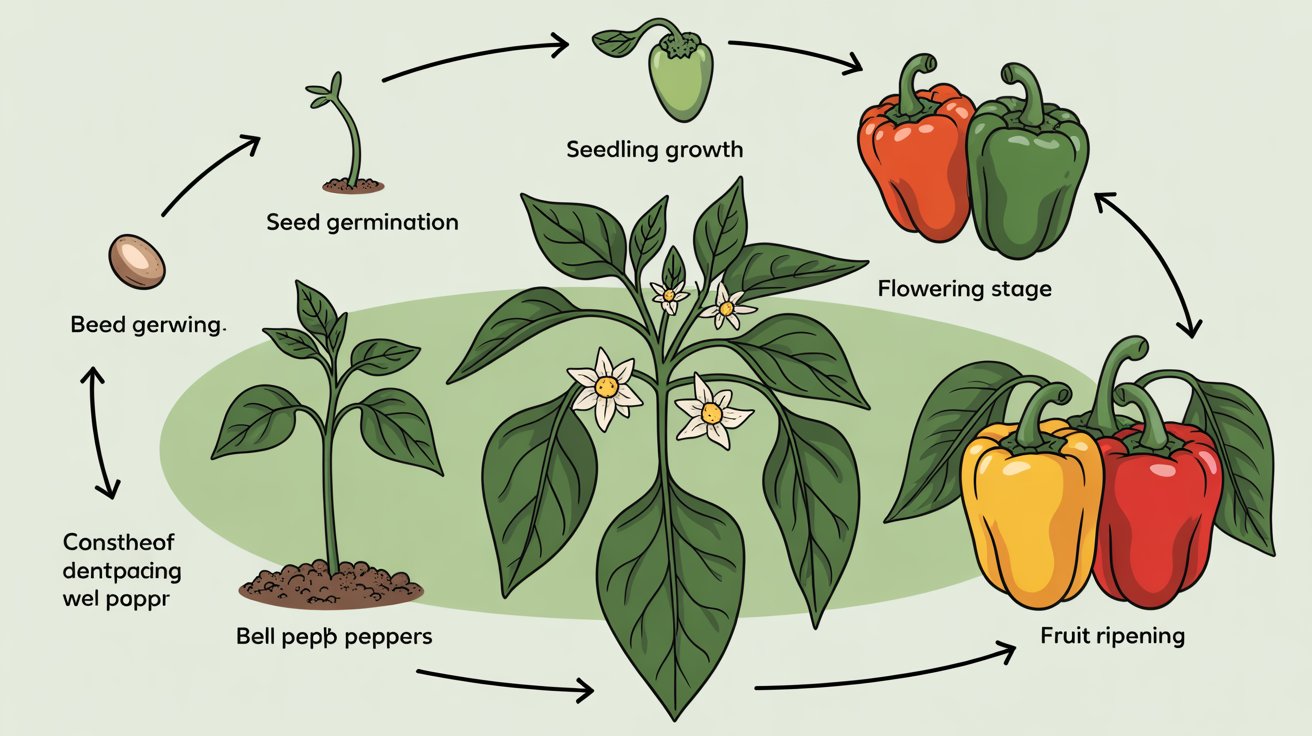
Although bell peppers are easy to grow, understanding their life cycle is essential. From seed germination to fruit harvest, each stage requires specific care. Therefore, this guide will walk you through the complete bell pepper growing process.
To boost visibility, this article uses high-volume keywords such as how to grow bell peppers, bell pepper growing stages, bell pepper plant care, and bell pepper life cycle. These terms are naturally integrated to support SEO performance and reader engagement.
Stage 1: Seed Selection and Preparation
The journey begins with choosing the right seeds. Bell peppers come in many varieties. Some are blocky and thick-walled while others are slender and sweet. Popular types include California Wonder, Red Beauty and Golden Bell.
Seeds should be purchased from trusted sources. Organic and heirloom varieties offer better flavor and disease resistance. Before planting, seeds may be soaked in warm water for 6 to 8 hours. This step softens the seed coat and improves germination rates.
Although bell peppers can be grown from store-bought seeds, success is not guaranteed. Therefore, certified seeds are recommended for consistent results.

Stage 2: Germination and Seedling Care
Bell pepper seeds require warmth to germinate. Temperatures between 70°F and 85°F are ideal. Seeds should be planted ¼ inch deep in seed-starting mix. Trays or pots with drainage holes are preferred.
- After planting, the soil should be kept moist but not soggy. A humidity dome or plastic wrap may be used to retain moisture. Germination usually occurs within 7 to 14 days.
- Once seedlings emerge, they need light. A sunny windowsill or grow light ensures healthy development. Seedlings should be thinned to prevent overcrowding. This step allows each plant to grow strong roots and sturdy stems.
- Although growth appears slow at first, patience is required. Bell peppers take time to establish before rapid growth begins.
Stage 3: Transplanting to Larger Containers
- When seedlings develop two sets of true leaves, they are ready for transplanting. This stage is critical because root growth accelerates. Seedlings should be moved to 4-inch pots filled with potting mix.
- Transplanting should be done gently. Roots must not be disturbed. Soil should be firmed around the base and watered immediately. A diluted fertilizer may be added to support growth.
- Although transplant shock is common, it can be minimized. Providing consistent light and moisture helps seedlings recover quickly. This stage prepares plants for outdoor conditions and strengthens their structure.
Stage 4: Hardening Off Before Outdoor Planting
Before moving bell peppers outdoors, they must be hardened off. This process involves gradually exposing seedlings to outdoor conditions. It reduces transplant shock and improves resilience.
- Seedlings should be placed outside for a few hours each day. Exposure time should be increased gradually over 7 to 10 days. Wind, sunlight and temperature changes help toughen the plants.
- Although hardening off may seem tedious, it is essential. Skipping this step can lead to stunted growth or sunburned leaves. Therefore, patience and consistency are key.
- Once hardened, bell peppers are ready for garden beds or containers.
Stage 5: Planting Bell Peppers Outdoors
Bell peppers thrive in warm soil. Outdoor planting should occur when temperatures remain above 60°F. Soil should be well-drained and rich in organic matter. Raised beds or containers are ideal for better control.
Plants should be spaced 18 to 24 inches apart. Rows should be 24 to 36 inches apart to allow airflow. A support stake may be added to prevent bending during fruiting.
After planting, the soil should be watered deeply. Mulch may be applied to retain moisture and suppress weeds. Fertilizer should be added every 3 to 4 weeks to support growth.
Although bell peppers are sun-loving, partial shade during extreme heat may be beneficial. This protects flowers and prevents fruit drop.
Stage 6: Flowering and Pollination
Bell peppers begin flowering about 8 to 10 weeks after planting. Small white blossoms appear at leaf junctions. These flowers are self-pollinating, but insect activity can improve fruit set. Therefore, attracting bees and hoverflies is beneficial.
- Although flowers may drop during extreme heat, this is normal. Providing shade and consistent watering helps reduce stress. Fertilizer with higher phosphorus content may be used to support blooming.
- Pollination occurs when pollen is transferred from the male part to the female stigma. This process may be assisted manually using a soft brush. Once pollinated, flowers begin to form tiny green fruits.
- Because flowering marks the transition to fruiting, care must be increased. Nutrient uptake and water demand rise during this stage.
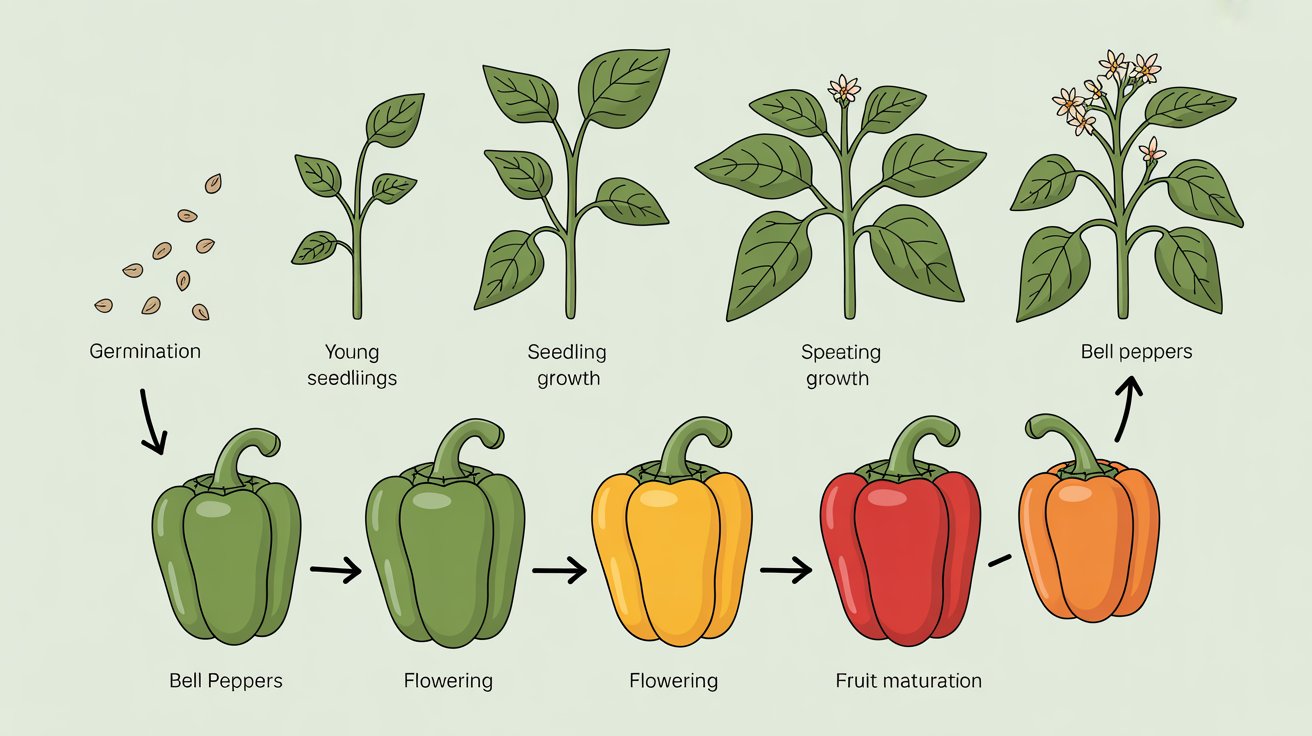
Stage 7: Fruit Development and Ripening
After pollination, bell peppers begin forming fruit. Initially, all peppers are green. As they mature, they change color depending on the variety. Red, yellow and orange peppers are simply ripened green ones.
- Fruit development takes 3 to 4 weeks. During this time, watering should remain consistent. Dry spells can cause blossom end rot, a condition where the fruit tip turns black and soft.
- Although nitrogen supports leaf growth, potassium is essential for fruit quality. Therefore, a balanced fertilizer should be used. Organic options like compost tea or seaweed extract are effective.
- Peppers may be harvested when green or left to ripen fully. Ripened peppers are sweeter and richer in nutrients. However, leaving fruit too long may reduce overall yield.
Stage 8: Harvesting Bell Peppers
Bell peppers are ready to harvest when they reach full size and desired color. A firm texture and glossy skin indicate maturity. Peppers should be cut using scissors or pruners to avoid damaging the plant.
- Harvesting should be done in the morning when temperatures are cooler. This preserves flavor and reduces stress. Frequent harvesting encourages more fruit production.
- Although green peppers are edible at any stage, waiting for full ripeness improves taste. Red and yellow varieties contain more vitamin C and antioxidants.
- After harvest, peppers should be rinsed and stored in a cool place. Refrigeration extends shelf life up to two weeks. Peppers may also be frozen or dried for long-term use.
Troubleshooting Common Bell Pepper Problems
Despite their resilience, bell peppers face several challenges. One common issue is blossom end rot. This is caused by calcium deficiency and inconsistent watering. Adding lime and maintaining soil moisture helps prevent it.
- Another problem is sunscald. This occurs when fruit is exposed to intense sunlight. Providing shade or planting in partial sun reduces risk. Damaged fruit should be removed to prevent disease.
- Pests like aphids, cutworms and spider mites may attack bell peppers. These can be managed with neem oil, insecticidal soap or companion planting. Marigolds and basil help repel harmful insects.
- Diseases such as bacterial spot and powdery mildew may appear in humid conditions. Proper spacing and airflow reduce infection risk. Affected leaves should be removed promptly.
FAQ: Bell Pepper Growing Guide
From seed to harvest, bell peppers take 60 to 90 days depending on variety and conditions.
Well-drained, fertile soil with a pH between 6.2 and 7.0 is ideal. Compost improves structure and nutrients.
Yes. Containers should be at least 12 inches deep. They allow better control over watering and spacing.
This is blossom end rot caused by calcium deficiency and uneven watering. Mulch and lime help prevent it.
Attract bees with flowers like cosmos and marigolds. Manual pollination using a brush also works.
Heat stress and poor pollination are common causes. Shade and consistent watering reduce flower loss.
Absolutely. Green peppers are edible and often harvested early. Ripening improves sweetness and nutrition.
Store in the refrigerator. They last up to two weeks. Peppers may also be frozen or dried.

Final Thoughts: Growing Bell Peppers with Confidence
Bell peppers offer beauty, flavor and nutrition. Their life cycle, though slow at first, rewards patience with vibrant fruit. By following this guide, gardeners can enjoy healthy plants and abundant harvests.
From seed selection to fruit ripening, each stage requires care and attention. Understanding the bell pepper growing stages ensures success. Whether grown in beds or containers, bell peppers thrive when given the right conditions.
Use this guide to plan your garden, troubleshoot issues and enjoy fresh peppers all season long. With the right strategy, your garden will flourish and your harvest will be flavorful.


- Be Respectful
- Stay Relevant
- Stay Positive
- True Feedback
- Encourage Discussion
- Avoid Spamming
- No Fake News
- Don't Copy-Paste
- No Personal Attacks
- Be Respectful
- Stay Relevant
- Stay Positive
- True Feedback
- Encourage Discussion
- Avoid Spamming
- No Fake News
- Don't Copy-Paste
- No Personal Attacks
